Wednesday, October 23, 2013

Bottle brushes

I know I went into great detail in my post about the microwave sterilizer, but I’m sort of a germ nut.  So, here’s how my process sort of went for cleaning bottles and nipples:

1    1.  First use a sponge brush on the bottles and nipples to clean them out.
      2.  Wash in dishwasher (use sterilize cycle, if possible).
      3.  Sterilize items in the microwave sterilizer.
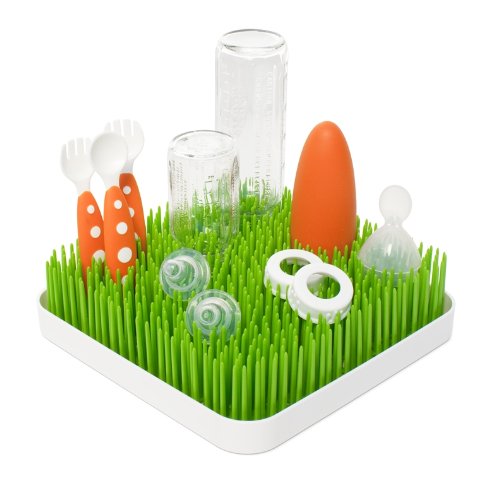
      4.  When possible, allow items to dry inside of the microwave sterilizer or on the drying rack, rather than reintroducing germs by drying with a towel or paper towel.

The initial washing with the sponge brush was because breast milk separates when it sits (either at room temperature or in the fridge).  


Ideally, you can mix all of this fatty thick layer back in with the breast milk before feeding it to a baby, but there are times when there are some milk fat hangers-on that stay on the side of the bottle.  If they’ve been there all day (if, say, daycare didn’t get it out of there when they gave your child a bottle at 9 a.m., and it’s now 5 p.m. when you’re cleaning it), this doesn’t always rinse out all that well with just water – which is where the sponge brush comes in.

Originally we tried one of the really general, cheap sponge brushes that you can get – we used a Munchkin, runs about $3.80 at Target (LINK):


The problem with this is that it has bristles.  Bristles work great on something like, say, a griddle – you can easily access all areas on a griddle with your hand, everything that is on there really requires a lot of elbow grease to remove, and it’s okay if you leave some residue, as it will wash off easily if you put it in the dishwasher (or wash it in the sink).  A bottle isn’t really the same at all, in my opinion – even with my tiny little-kid-sized hands, I can’t get my hands all of the way into most bottles on the market, especially not while holding a rag or brush.  The creamy milk fat that gets stuck in there is gunky and slimy enough that it always seemed to me like the individual bristles of a brush would get most of it, but not all (unless I sat there and spun it around for 5 minutes straight).  I did not feel like it was a good idea to leave any of that residue inside of the bottle, because the sprayer jets in a dishwasher (see step 2) don’t usually spray at just the right angle to get inside of a bottle and clean the entire circumference. 

So, I scrapped the brush with bristles.  Since it was less than $4, I didn’t mind just keeping it as a backup, or to use on wine glasses (were we to ever drink or have people over who didn’t need to use sippy cups).  I did some research, and found this brush by Born Free (LINK):  


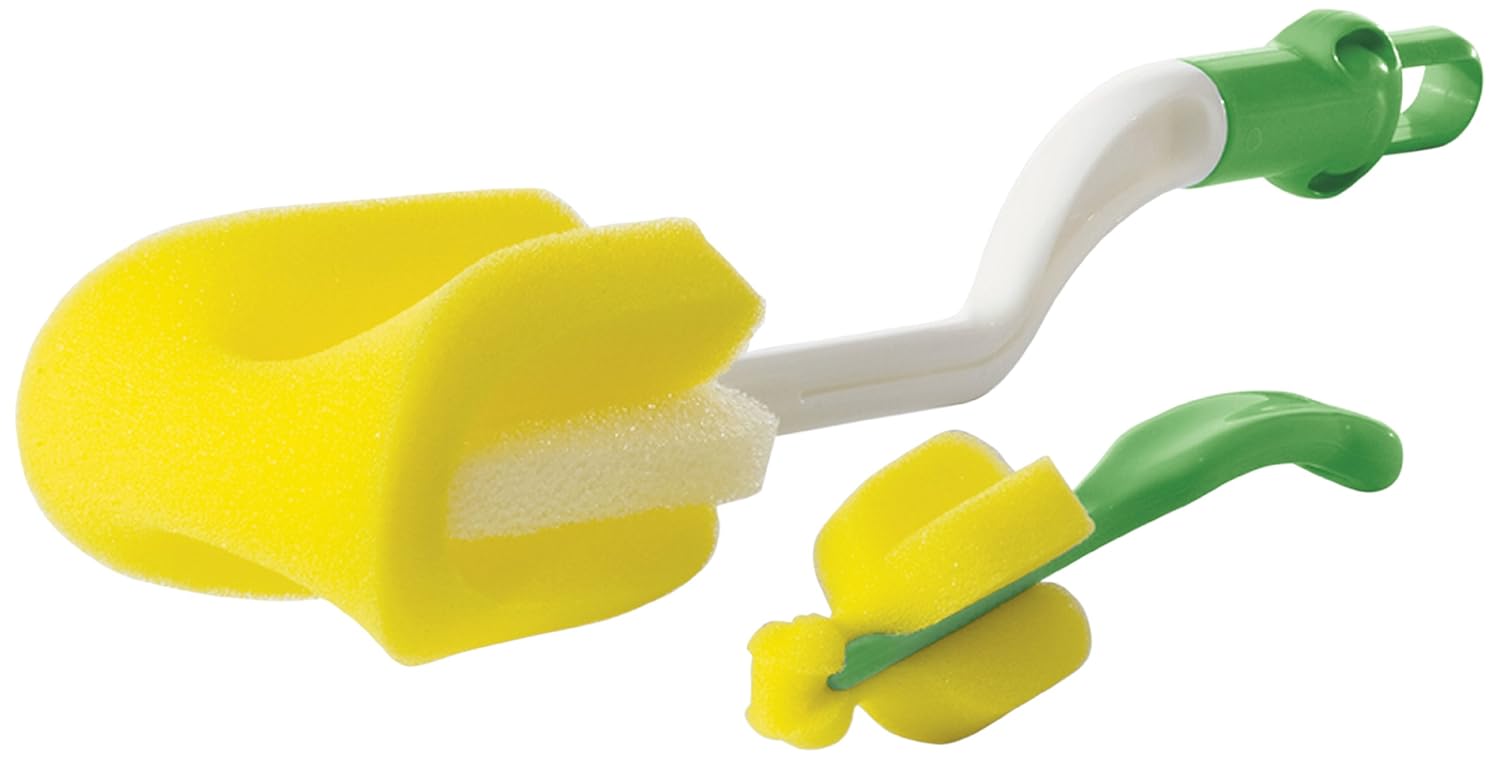
It’s a sponge wrapped around another sponge.  Since there are no individual bristles, this just swept the inside of the bottle as if I were able to get my hands down in there to clean it by hand with a rag.  Since it’s one contiguous piece, it grabs up all of the milk cream.  Rinse the sponge between bottles, and you can easily and quickly clean out several bottles’ worth in just a few seconds. 


If we had fed Pickle spaghetti sauce or something in her bottle, I think the bristle brush would have been more useful.  But since the milk cream is so filmy and slick, the sponge brush was a much, much better purchase, in my opinion.

Tuesday, October 22, 2013

Diaper Genie


Hence…  we had to have somewhere to put those little chipmunk-sized stinkbombs that kept reproducing every few hours.  I’d had a lot of friends recommend the Diaper Genie (LINK), and I understood the principle behind it, so we went with it.


So, the theory behind a Diaper Genie is that it’s this thin thing, inside which there are liners.  You push a diaper down the top of it into the base, and the combination of the puckered top and the lid are supposed to contain the stink.  You keep pushing diapers into this long worm-shaped plastic bags until it’s either too full to shove anymore into it OR your partner refuses to change it, but is instead just setting dirty diapers on top of the Diaper Genie.  (In our house, we took turns playing that passive-aggressive game to get out of changing the bag.)  You remove the top, pull out the long snakey-looking plastic bag of dirty diapers, pull out the next one and get it all set up to receive your child’s next batch of poop- or pee-soiled undergarments, and then you figure out a way to get a four-foot-long bag of diapers into your regular trash bag.

As you could maybe guess from the above description, this system has some flaws.  First of all, let’s think about a bratwurst (I’m from the Midwest, that’s a thing here – if you don’t know what one is, think of a hot dog).  When a bratwurst is cooked too long and it expands too much, the sides burst.  Sort of the same principle with an overstuffed Diaper Genie bag – the sides can blow out.  This can even happen if it’s not overstuffed.  Then you just have a bedroom/laundry room/whatever with dirty, smelly diapers all over the floor.  This inevitably happens at 3 a.m., when you are least prepared to clean up 50 dirty diapers that have just rolled under the bed.  And of course some of them had blowouts on them, because you’re dealing with little babies.  So now that’s on your carpet or hardwood. 


Also, Diaper Genie knows what’s up.  They’re the most recognized diaper pail system out there, so they know that they can charge about $14 for a two-pack of pail liner things.  And there’s a fair number of bags in each one… but there are also a fair number of diapers used each day, so you’re going through them more rapidly than you would guess.  It’s a pretty sweet deal for Diaper Genie – I mean, how much can production costs actually be to snake together some tiny, skinny garbage bags and put them in a cardboard container?  But they’re smart enough to shape the insert so that you can’t really use anything else in there.


The good thing about the Diaper Genie is honestly that it does a good job at containing the smell from invading your room, and it’s an efficient way to contain that smell for a few days at a time while you wait for the bag to fill.  But, if we get pregnant again, I think we’ll likely look at another option as far as diaper disposal.  There are systems that can just use regular old trash bags – or else we also have room in our garage for just another regular old garbage pail that we could just use for dirty diapers.  I think either of those would be more efficient, time-saving systems.

Tuesday, October 15, 2013

Dollar Tree

This isn’t really so much about a single item, as a store.  The Dollar Tree, to be exact.  It’s a little more true to its name than Dollar General – I honestly don’t know of many items in there that are actually more than $1.  This works sorta great with kids.  I mean, you don’t really feel bad about getting them three items when it’s only going to be $3 total. 

At Pickle’s preschool/daycare, all of the kids usually bring a treat and a little something for all of the other kids on their birthday.  When there are 12 to 16 kids in the class, that can add up pretty quickly.  Usually the kids get a kazoo or some sidewalk chalk or something, and then the treats have to be pre-packaged, nut-free (no children in her class have dairy or gluten allergies, so we’re pretty safe there).  The week of her birthday, the class had been studying insects and their habitats – so, Pickle and I went to the Dollar Tree, where they had butterfly nets in an assortment of colors for $1 each.  


We got one for each child, and then found some pudding with cookies in it (we figured something ridiculously unhealthy was okay for one day) – there were four of them in each $1 pack.  So, we ended up doing her entire birthday for 14 kids and two teachers for around $20.  The best part was that the gifts were a huge hit – we walked in to pick up Pickle that night, and the director of the school stopped us to inform us that our gift idea had been so popular on that rainy day that the kids were running all over the classroom “catching butterflies” with them as part of their learning curriculum.  Thanks for making us look like rock stars, Dollar Tree!

We also just sometimes go in when the Pickle needs some new craft items, or when she has a few dollars and wants to get a special treat.  For example, we went this past weekend, and I told her that she could get any three items she wanted.  It was the best game in the world to her – she looked at the giant fake Halloween spiders and giggled when she thought about scaring Daddy with them.  She looked at the Christmas items, and the crafts.  She thought about all of the fun things she could paint and decorate.  We obviously ended up in the toy aisle.  She came home with a bouquet of fake flowers (for when she pretends to be Little Red Riding Hood), some new markers, and a 24-piece puzzle of Little Red Riding Hood and the Big Bad Wolf (they had many other ones, too – Disney characters, Jack and the Beanstalk, etc.).  So, when I look at it from a developmental standpoint – she got something to aid her in pretend play, something to aid in creativity and hand/eye coordination, and something to help improve her logic and problem-solving skills.  That’s not a bad haul for $3 plus tax, and it kept us busy for the majority of the day on Sunday. 


I’m not going to say I’d necessarily get, like, an heirloom piece or anything there, as these items are probably going to break faster than toys you get elsewhere – but it’s a great, inexpensive way to fill a bag of new “presents” to take on a long car ride, or pad your craft stock, or so on.  It’s worth the time to go!

Wednesday, October 9, 2013

Bottle Drying Racks

As much as I would have loved to have stayed home with the Pickle for forever, and nursed her without ever needing to pump, it wasn't really an option for us.  We wanted to, you know, eat and such.  And feeding her seemed like a pretty cool idea, too.

Since we knew we would have to use some bottles, we are reasonably intelligent people and knew we'd need to wash those bottles.  And, taking our powers of deduction a step further, we knew that we would need something on which to dry the bottles after we washed them.  Our kitchen at our old townhouse was insanely small, so this was going to be a little bit of a problem, as we didn't really have a ton of counter-space or room in the cupboards to accomplish this.

A close girlfriend had strongly, strongly recommend the Dr. Brown's Drying Rack (LINK), which ran about $15 at the time ($13 now on Amazon):


You can tell from there essentially what it does.  It has two racks - the lower shelf is very short, so it's used for the cap and nipple parts of Dr. Brown bottles, and the bottles can be put on the top shelf.  It's not beautiful or much to look at, but it's utilitarian.

We ended up not using Dr. Brown's bottles very often (Pickle didn't have any tummy issues that required their ventilation system, and they were sort of a leaky pain in the butt), so we didn't really need the lower rack a whole bunch.  We'd put our Medela bottle caps on there, but they only fit so-so, and I hated having to lift the top rack off any time we washed bottles.  We ended up mostly just using the top shelf - which was okay, but if we did a huge batch of bottles, we ended up not having a ton of room for both the bottles and the nipples/caps, so we'd be using those peg things and everything else just to try and cram a bunch of stuff on there.  It worked okay, and we used it the whole time Pickle was little, but I just don't think it was an incredibly efficient use of space.  And it was really ONLY useful for bottles, as the little nubs on which the bottles rest aren't really tall enough to support a sippy cup.

If we have another child, I don't think we'd probably use this drying rack again.  After a lot of looking around at Buy Buy Baby and Babies R Us, I think we'd probably get the Boon Winter Grass Countertop Drying Rack (LINK), which currently runs a few dollars more at $15 on Amazon:


As you can tell from the photo, it's not huge (9.5 inches by 9.5 inches), so you may want to get two plots of grass if you have a lot of bottles.  But I think this idea is a lot more practical than the Dr. Brown's rack.  There's not just a limited number of nub-thingies, there is nothing but nub-thingies on this rack.  You can essentially choose what items you want to put on there, how many you can fit, and where they go.  The nubs are deeper than the shorter ones on the Dr. Brown's rack, so you can put silverware and sippy cups on there.  Additionally, it's much more visually appealing than the Dr. Brown's rack (especially if you have a modern kitchen/house).  It's free of PVCs, BPAs, and phthalates, as well, so it should be very safe to come in contact with items that will go in baby's mouth.

Additionally, you can make a whole little garden with the add-on accessories that Boon makes.  They have flowers and twigs that you can hang in there to increase the number of nipples and caps you can hang, so that they're not taking up as much of the "grass" area.  They both look like this:

I believe you can get both the accessories and the "grass" both come in various colors, as well, so you can make them work with your color scheme.  I like a lot of Boon's stuff, because I think it's fun and creative, and so this is something I'll likely try in the future, given the chance.

Tuesday, October 8, 2013

Nursing bras and tanks

I've got big breasts, and I cannot lie.  Pregnancy and nursing sort of made the situation a little closer to critical mass.  I was afraid of hurting someone with them, poking an eye out or something.

I felt like I needed to somehow get some support when I was pregnant even while sleeping, so I did some research.  I found the Medela Sleep Bra (LINK).  


(Normally I would put a photo here, but the smiling chick in the link freaked me out.  Just click the link above.)

They run in the neighborhood of $15 to $20, depending on the size you want, the color, and so on.  Amazon didn't have them at the time I was pregnant, and I had only found them on the Gap's website in the nursing/maternity section.

As far as comfort goes - I'll be honest, I still wear these to bed even though I'm neither pregnant nor nursing.  They're very soft, stretchy.  They're not constricting like a sports bra, it's just a lot like wearing a really snug-fitting t-shirt.  On the other hand, it's not as supportive as a sports bra - but you're not running in it or anything, it's just making sure you don't hit yourself or your loved one(s) in the face with your boobs while you sleep.  

As far as nursing in this goes, it's really easy - it has a cross-body opening in the front, so you can just nurse really quickly and cover back up at 3 a.m.  I'm sure there are other nighttime nursing bras out there, but these were relatively cheap, worked well, and were from a brand I knew.  So, since it isn't broken, we haven't fixed it.

After Pickle was born, though, I needed to find a solution that worked well at home, and then again when I went back to work.  A girlfriend had recommended these nursing tanks (LINK), found at Target:


Although, to be honest, I'm not 100% sure that this is the right one, since I can't see the photos.  Depending on your preference, I would go into the store.  I say this because one of the nursing tanks was shaped like this (the orange part is the under-layer when you unsnap and then fold down the outside part of the tank you see above):


As you can sort of see (this is a terrible drawing), the bottom layer is just cut a lot lower so that you can pull your breast out.  

On the other hand, one of the tanks has the under-layer (again in orange) shaped like this:


Yeah, that would be a hole just a little bigger than your nipple that you're apparently supposed to thread your boob through.  Which, if you're nursing, is stupid and limits skin-to-skin.  And, if you're pumping, you're supposed to somehow fit the flange through there, or get enough of your breast out to get into the flange.  Just - no.  So be careful of what your preference is.  I couldn't take these seriously enough to use them when I accidentally ordered the wrong one, so I took it back.

I used the nursing tanks a ton, however - even after I went back to work, I continued to wear them (the top one, obviously) for a considerable amount of time.  I felt like I was more covered in my stomach area when I pumped, just on the off chance someone happened to walk into the room (which did happen once).  They're about $20 or so - I believe there are similar options elsewhere, we just had a Target local.  

I officially switched to a supportive bra later, however, as nursing tanks sort of leave you flopping around.  I did avoid an underwire (even though I need one for support) because it can affect production.

Thursday, October 3, 2013

Beaba Babycook Baby Food Maker

Without getting into the whole "delaying solids vs rice cereal" debate, we delayed solids with Pickle until she was six months old.  We did mostly baby-led weaning, but she became anemic due to only being breastfed and not being particularly enthralled with food, so we did end up having to do some baby food with iron-fortified oatmeal mixed in to raise her iron levels around 9 months or so.

I wasn't particularly excited about giving her the baby foods on the market, though - mostly because they overall sort of smelled and looked like vomit.  I mean that in the nicest way, but if it makes me want to gag to open it, I can't imagine it was going to make her MORE excited about eating when she was already just so-so on the concept of solids.

I did some research (shocking, I know), and had found the Beaba Babycook Food Maker (LINK), about $120 on Amazon:


You'll notice that this is not the cheapest option - items like the Baby Bullet are cheaper.  I am not a good cook (that's an understatement), so I really liked that this one had a steamer where you could first steam the food you were making (apples or broccoli or whatever), then purees it.  You can also reheat or defrost food in here, if need be.

I really liked this.  It was incredibly easy.  I would just clean some fruits or vegetables (it also does meat, but that sort of grossed me out) into there, steam it, and then grind it.  We had little storage cube things, and put the food in there to freeze.  (You can get them through Beaba, but theirs are super-expensive, so we didn't do that.)  We then brought them back out, put them in here to defrost, and were good to go.  As I mentioned, I can barely cook mac and cheese, so the ease of this was crucial, since I made all of the baby food.

It comes with a little recipe book, which was kind of neat, but I mean, how hard is it to just put apples and bananas in together and puree them?  But it was still a nice idea, and what was more helpful in the book was that it told you for how long you needed to cook everything (there are little dials on the top of the device, it would tell you to do two or three "clicks" or what-have-you).  

Cleaning it was a little bit of a pain, just because I didn't feel very comfortable putting the blade or the cooking cup thing in the dishwasher, but it really wasn't too bad.  I just have this innate fear of slicing my fingers open because I don't know what I'm doing - since my husband stabbed through his entire finger with a fork two days ago, this is a valid concern.  

The plastic was BPA- and PVC-free, if you're into that sort of thing.  I think most things these days are, but it's an extra little pat on the head.  

Anyway - I got this about 2.5 years ago, but I see their line has expanded a lot since then - there's a "Pro" model that can cook more food at a time, and also a Pro2X that has two blending cup areas.  The small amount of food you could cook at a time would actually be my only complaint on this item - you'd get, like, half a mango in there and have to do a new batch.  So I think those might be worth the extra money.

For us, this was a great purchase, since I probably wasn't going to go and figure out how to steam food outside of this thing.  It was helpful to do it all in here - I'll even use it still just to steam some broccoli or something for dinner.  If you have that sort of knowledge, however, it would probably be a little cheaper to steam it some other way first and then either get a stick blender or a Baby Bullet.  This was very good for the cooking-illiterate, however, so I feel like we have gotten our money's worth.


Tuesday, October 1, 2013

Summer Infant Mother's Touch Deluxe Baby Bather

I was pretty nervous about bringing Pickle home after she was born.  Our old townhouse had three levels; I was afraid I was going to drop her while walking up stairs.  I was afraid I was going to hurt her while taking her shirts on or off over her head.  I was afraid of sleeping situations, and everything else.

I was also a bit afraid of giving her baths, because what if I dropped her?  I had a sprayer in my shower/bathtub, but would it be too harsh on her sensitive little skin to spray her with it?  

I had been discussing this all with my great friend Amanda prior to Pickle's birth, and she let us borrow their infant bathtub (which we still have for you, Amanda!).  It was sort of like this model (LINK), except theirs was nicer and looked less flimsy:


It had a sprayer for a baby shower, a bathtub, and so on.  You put the water in the little bathtub, then used the sprayer, which was incredibly gentle.  I LOVED this bath in concept, but the problem was that I never realized we could have done this all by putting the bathtub inside of the regular bath - we were filling the tub, taking it out into the middle of our bathroom (which was too small for this whole setup), giving a bath, then lugging the tub back to the big bathtub to dump it out.  Since my husband was working second shift then to minimize our daycare needs for Pickle, and I was post C-section trying to do this by myself often, this wasn't an incredibly ideal situation.  

I did some research, and found the Summer Infant Mother's Touch Deluxe Baby Bather at Wal-Mart or Amazon (LINK):


It ran about $16 or so, which was a lot cheaper than most of the bigger tubs on the market.  The back reclines to three different levels (sort of like a La-Z-Boy for the bathtub), so you could recline it more for newborns, and then raise it as the baby got older.  Even though that mesh on the sides is pretty sweet, I probably wouldn't recommend using it after the baby can sit up on his/her own, even if you can keep a hand on the child at all times.  

The back was mesh, so basically you can just set this in the big bathtub, fill the tub, and water will come up through the mesh and warm baby's back and butt.  Any water you need to pour on the baby just drains down through the mesh instead of needing to be drained/wiped down later, which was convenient.  I just would leave the chair in the bathtub for a couple of hours to dry after each bath.  It folds in half to store without taking almost any room, too, which was also incredibly convenient in our small space.

I didn't find this incredibly convenient to lean over the tub and do, however, as we had a bathtub with the rails for sliding doors in it - so that ended in a lot of sore armpits.  So, here's what we had to do:

(You may notice the strong family resemblance.)

I don't care if it seems weird that I drew myself in a swimming suit, I don't even want cartoon nudies of myself on the internets.  Anyway - I ended up having to crawl into the bathtub with Pickle and bathe her that way.  It also felt more secure safety-wise to be lifting her head up to wash her hair from the front, rather than from the side, while she was so slippery.  Also, I think I made less of a mess this way, which was also nice.  (Side note - I sort of wish our old tub had been this modern looking, I would have liked it a lot more.)

So, all told - if you would prefer not to put a little tub into a big tub, or you're not smart enough to figure it out until three years after your child is born (or, more practically, you want to save some money), this is a really solid solution.  I think we still have it hanging around somewhere, and would likely use it on another child.  I liked the fact that it was a chair, and that the baby wasn't just lying on the floor of a tub.